As the leaves begin their vibrant transformation and a crisp chill fills the air, thoughts invariably turn to the comforting aromas of fall baking. And at the heart of many cherished autumn treats, from pies to lattes, lies the humble pumpkin. While canned pumpkin puree certainly has its place for convenience, there's a world of difference when you embrace the magic of making your own. This comprehensive pumpkin puree recipe isn't just about ingredients and steps; it's about unlocking a depth of flavor, a superior texture, and an unparalleled freshness that will truly make your fall desserts unforgettable. Prepare to create show-stopping masterpieces with ease!
Elevate Your Fall Baking: Why Homemade Pumpkin Puree Reigns Supreme
Imagine a pumpkin pie with a filling so rich, so naturally sweet, and so incredibly fragrant that it transcends all expectations. That's the promise of homemade pumpkin puree. While a can offers a quick fix, the difference in quality is truly astounding. Our from-scratch pumpkin puree recipe delivers a puree that is:
- Richer and Sweeter: Roasting a fresh pumpkin caramelizes its natural sugars, intensifying its flavor in a way that canned versions simply cannot replicate. The resulting puree boasts a vibrant, authentic sweetness and a deeper, more complex pumpkin essence.
- More Fragrant: The act of roasting pumpkin fills your kitchen with an intoxicating aroma that signals the start of the holiday season. This beautiful fragrance translates directly into your puree, imbuing your baked goods with an unparalleled autumnal scent.
- Better Moisture Control: Store-bought purees can sometimes be overly wet or inconsistently textured. When you make your own, you have complete control. For recipes like delicate pumpkin cookies or custardy pies where moisture content is critical, the ability to achieve the perfect consistency (even straining if necessary) is a game-changer. This ensures your baked goods achieve their ideal texture every time.
Beyond the superior taste and texture, there's an undeniable satisfaction in crafting ingredients from scratch. Plus, making your own puree offers a delightful bonus: the chance to roast the delicious pumpkin seeds once you’ve scooped them out! It’s a wonderful "twofer" that adds an extra layer of enjoyment to your culinary endeavors. For a deeper dive into the benefits, read Why Homemade Pumpkin Puree Beats Canned for Richer Flavor.
Choosing Your Perfect Pumpkin: The Secret to Superior Puree
Not all pumpkins are created equal, especially when it comes to making the best puree. The type of pumpkin you select plays a crucial role in the flavor, texture, and overall success of your homemade creation. This is perhaps the most important tip for any pumpkin puree recipe.
The Ideal Candidate: Sugar Pie Pumpkins
For centuries, the small, unassuming sugar pie pumpkin (also known as pie pumpkin or baking pumpkin) has been the go-to for culinary uses. Here's why:
- Dense, Smooth Flesh: Unlike their larger counterparts, sugar pie pumpkins have a firm, dense flesh with minimal stringiness. This results in a smoother, richer puree.
- Naturally Sweet: As their name suggests, these pumpkins are bred for sweetness, offering a concentrated pumpkin flavor that is less watery and more robust.
- Manageable Size: Their smaller size (typically 2-8 pounds) makes them easier to handle, cut, and roast in a standard home oven.
Avoid Jack-O'-Lantern Pumpkins
While fun for carving, the large, thin-walled pumpkins used for Halloween decorations are generally not suitable for culinary purposes. Their flesh tends to be stringy, watery, and bland, leading to a much less satisfying puree.
Excellent Alternatives: Kabocha and Other Winter Squash
If sugar pie pumpkins are scarce, don't despair! Several other winter squash varieties make fantastic stand-ins:
- Kabocha Squash: This Japanese pumpkin is an exceptional dupe for sugar pie pumpkin. It boasts a similar dense, sweet, and nutty flesh that roasts beautifully and yields a velvety smooth puree. An added benefit is that kabocha often roasts more quickly than traditional pumpkins.
- Butternut Squash: While slightly different in flavor, butternut squash offers a wonderfully smooth texture and sweet taste, making it a viable option for puree.
- Acorn Squash: Another good choice, acorn squash provides a somewhat nuttier flavor profile, which can add an interesting dimension to your baked goods.
Selecting Your Pumpkin
When choosing your pumpkin or squash, look for these signs of quality:
- Intact Stem: A pumpkin with 1-2 inches of stem still attached indicates it was properly harvested and is healthy. Avoid pumpkins with broken or missing stems, as they can be more prone to spoilage.
- No Bruises or Cracks: Inspect the skin for any soft spots, bruises, or cracks, which can be entry points for mold and bacteria.
- Heavy for its Size: A pumpkin that feels heavy for its size is a good indicator of dense, moist flesh.
For more detailed insights on pumpkin varieties and roasting techniques, explore Unlock the Best Pumpkin Puree: Tips for Roasting & Varieties.
Your Easy Homemade Pumpkin Puree Recipe: Step-by-Step Guide
This pumpkin puree recipe is incredibly simple, requiring just one core ingredient and minimal effort for maximum flavor payoff. Get ready to fill your home with the most incredible aromas!
Gather Your Tools and Ingredients
The beauty of this recipe lies in its simplicity. You truly only need one main ingredient!
- 1 Sugar Pie Pumpkin (or Kabocha, Butternut, etc.), 2-4 lbs: Look for a healthy, firm pumpkin as described above.
- Optional: A pinch of salt (for roasting – enhances natural sweetness).
Essential Equipment:
- A sharp, heavy chef's knife
- Large baking sheet
- Parchment paper
- Large spoon or ice cream scoop
- Food processor or high-speed blender
- Optional: Cheesecloth (for extra-dry puree)
- Optional: Kitchen towel (for safe cutting)
Preparation & Safe Cutting
Cutting a pumpkin can seem daunting due to its tough exterior, but with a few safety tips, it's a breeze:
- Preheat Oven & Prep Tray: Preheat your oven to 400°F (200°C). Line a large baking sheet with parchment paper. This prevents sticking and makes cleanup a cinch.
- Stabilize Your Pumpkin: To prevent the pumpkin from rolling, place one half of a kitchen towel folded under it on your cutting board. Use the other half of the towel to hold the pumpkin firmly in place while you cut.
- Carefully Cut in Half: Using your sharp, heavy chef's knife, pierce into the middle of the pumpkin. Apply steady, firm pressure, rocking the knife back and forth or making small incisions all the way around until you can split the pumpkin in half. Be patient and prioritize safety over speed.
- Scoop Out Seeds and Pulp: Use a large spoon or an ice cream scoop to thoroughly scrape out all the seeds and stringy pulp from both halves. Don't discard the seeds! Set them aside if you plan to make delicious roasted pumpkin seeds – a fantastic savory snack.
Roasting for Optimal Flavor
Roasting is the key to developing that deep, sweet, concentrated pumpkin flavor:
- Position on Baking Sheet: Place the pumpkin halves, cut-side down, onto the prepared baking sheet. You can lightly season the skin with a pinch of salt if desired, which can help draw out moisture and enhance sweetness. Placing them cut-side down allows the pumpkin to steam gently, creating tender flesh, while also allowing the natural sugars to caramelize against the hot baking sheet.
- Roast Until Tender: Bake for approximately 35-55 minutes. The exact time will depend on the size and thickness of your pumpkin. You'll know it's done when the flesh is fork-tender and easily pierced, and the skin begins to pull away from the flesh. The kitchen will begin to fill with an incredible, sweet aroma – a true sign of autumnal bliss!
- Cool Completely: Once tender, remove the pumpkin from the oven and let it cool completely on the baking sheet. This cooling period is important as it allows the pumpkin to firm up slightly and makes it easier to handle.
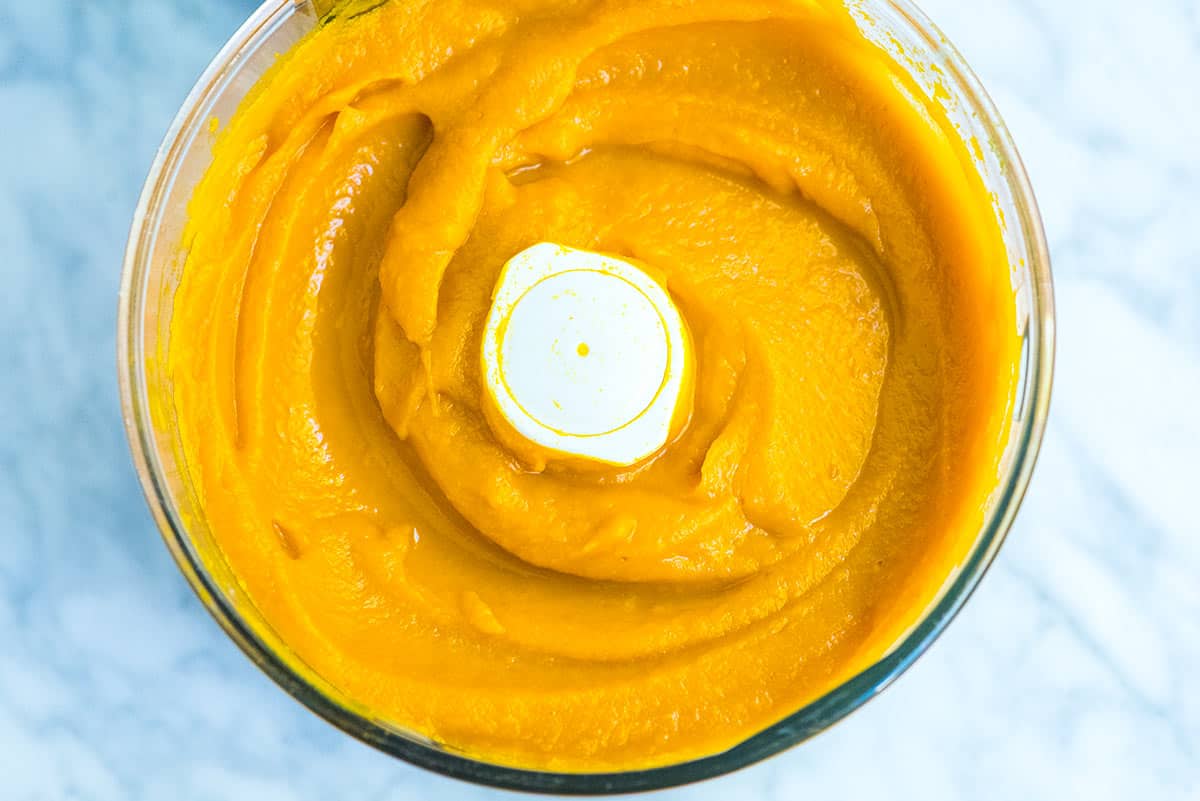
Blending to Velvety Smoothness
The final step transforms your roasted pumpkin into a luscious puree:
- Scoop Out Flesh: Once cooled, use a spoon to scoop the soft, cooked pumpkin flesh away from the skin. The skin should peel away easily. Discard the skins.
- Blend Until Smooth: Transfer the pumpkin flesh to a food processor or high-speed blender. Process until incredibly smooth and creamy, scraping down the sides as needed. Depending on your pumpkin and processor, this may take a few minutes. If it seems too thick, you can add a tablespoon or two of water, but typically, roasted baking pumpkins yield a perfect consistency.
- Optional Straining for Specific Recipes: For recipes where moisture content is paramount, such as pumpkin pie, cheesecake, or very delicate cookies, you may want to strain your puree. Line a fine-mesh sieve with a double layer of cheesecloth and place it over a bowl. Pour the puree into the cheesecloth and let it drain for 30-60 minutes, gently pressing to release excess liquid. This will result in a thicker, denser puree perfect for recipes that require precise moisture levels. For most other recipes like muffins, breads, or soups, straining is not necessary.
Storage and Creative Uses for Your Fresh Puree
Once you’ve mastered this pumpkin puree recipe, you’ll want to have it on hand for all your fall culinary adventures!
Storage Guidelines:
- Refrigerator: Store your homemade pumpkin puree in an airtight container in the fridge for 5-7 days.
- Freezer: For longer storage, homemade pumpkin puree freezes beautifully. Portion the puree into freezer-safe bags or containers (freezing in 1-cup increments, similar to canned pumpkin, is very convenient). Label with the date. It will keep in the freezer for up to 3 months, ready to be thawed and used whenever a pumpkin craving strikes. Thaw overnight in the refrigerator before use.
Beyond the Pie: Creative Uses for Your Puree:
While essential for pumpkin pie, your fresh puree is incredibly versatile. Here are just a few ideas:
- Baked Goods: Muffins, breads, pancakes, waffles, scones, cookies, and even savory biscuits.
- Desserts: Puddings, custards, cheesecakes, ice cream, and parfaits.
- Drinks: Homemade pumpkin spice lattes, smoothies, or even fall-themed cocktails.
- Savory Dishes: Creamy pumpkin soup, pumpkin pasta sauces, risottos, chili, or even as a base for fall curries.
- Breakfast: Stir into oatmeal or yogurt for a seasonal twist.
Making your own pumpkin puree from scratch is a rewarding experience that elevates your fall baking from delicious to truly extraordinary. This simple pumpkin puree recipe not only promises richer flavors and better textures but also infuses your kitchen with the comforting scents of autumn. Take the leap this season, embrace the natural goodness of fresh pumpkin, and prepare to impress everyone with your show-stopping homemade treats. Happy baking!
